MapSVG Documentation
If you have problems/questions - please read FAQ first before mailing me.
Installation
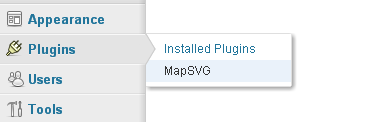
Unpack .zip to WordPress plugins folder: "/wp-content/plugins/". Activate MapSVG plugin from control panel (Menu > Plugins > Installed Plugins > MapSVG : Activate).A new submenu element in "Plugins" section will appear. Open it: (Menu > Plugins > MapSVG).
In MapSVG control panel page click "Add new map", choose a map from drop-down list, and set all options. You'll find small hints under option fields which will help you. After you're done, click "Save".
You'll see a blue message with shortcode on top of the screen:
Add this shortcode to a page: [mapsvg id=6]
Insert this shortcode to any page of your WordPress site.

Please note you can insert additional "selected" option into a shortcode. Use this when you need to insert same map into many pages with just different initially selected country:
[mapsvg id=6 selected="USA"]
Adding more maps
Just copy .svg files to "/maps" folder inside of MapSVG plugin's folder. They will automatically appear in plugin's drop-down list.Adding marker images
Put images to "/markers" folder inside of MapSVG plugin's folder. Marker image must point to its bottom side (like a pin) for exact marker position adjustment at different map sizes.
If you have problems/questions - please read FAQ first before mailing me.
Thanks for purchasing!